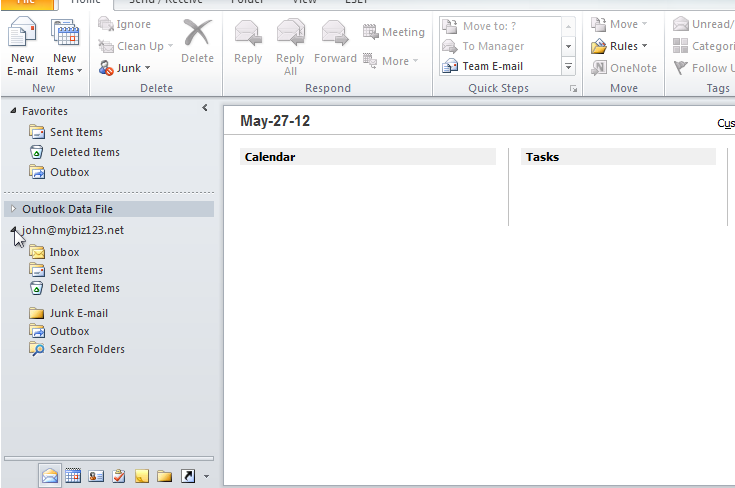
This tutorial assumes you’ve already launched Outlook 2010.
Example:
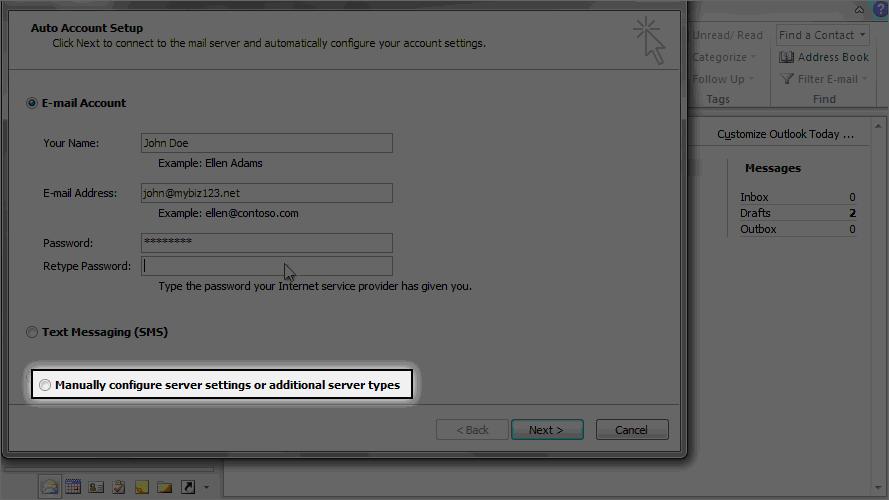
Name: John Doe
Email is john@mybiz123.net
password is xxxxxxx
Email client setting up information:
Username/Email: john@mybiz123.net
Password: xxxxxx
Incoming Server: mail.mybiz123.net
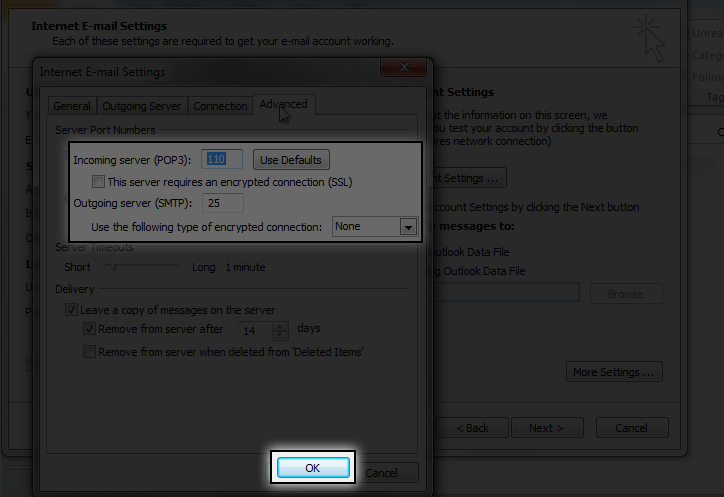
IMAP Port: 143
POP3 Port: 110
Outgoing Server: mail.mybiz123.net
SMTP Port: 587
Leave Message on server: 15-30 days
Authentication is required for IMAP, POP3, and SMTP.
You have to replace
john@mybiz123.net by your real email
mybiz123.net by your real domain name
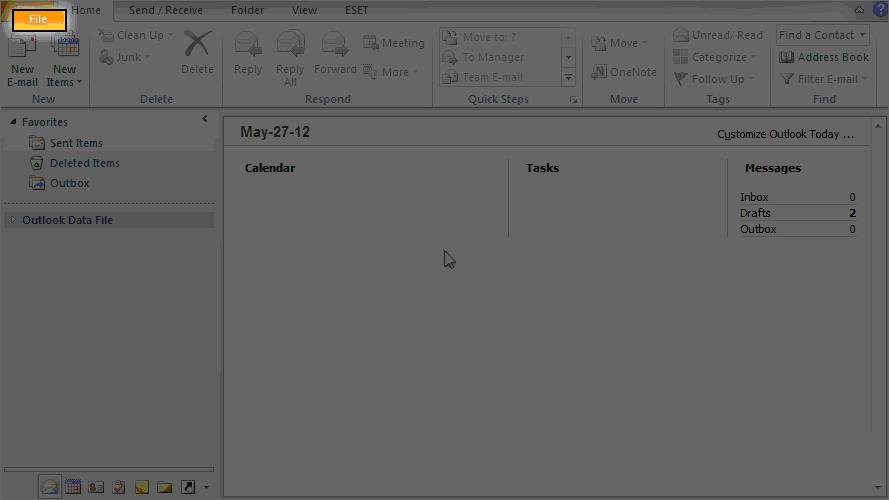
1) To configure a POP email account, first click the “File” tab.
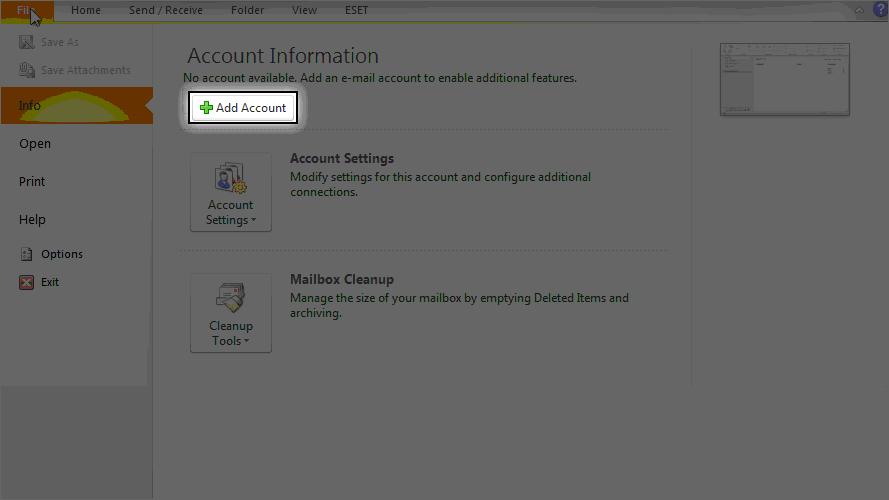
2) Then click The “Add Account” button.
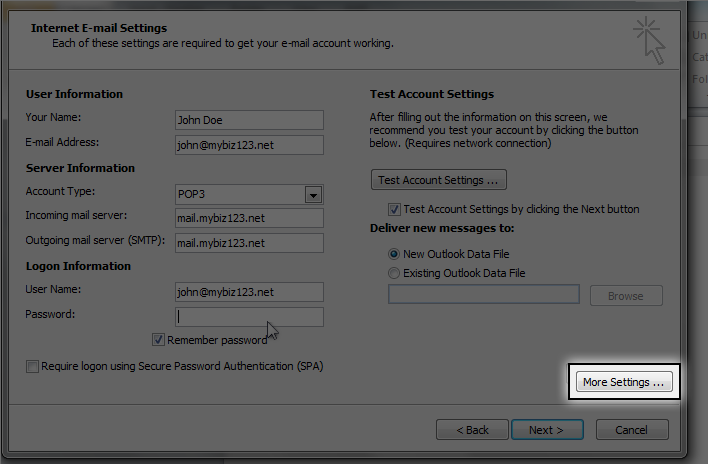
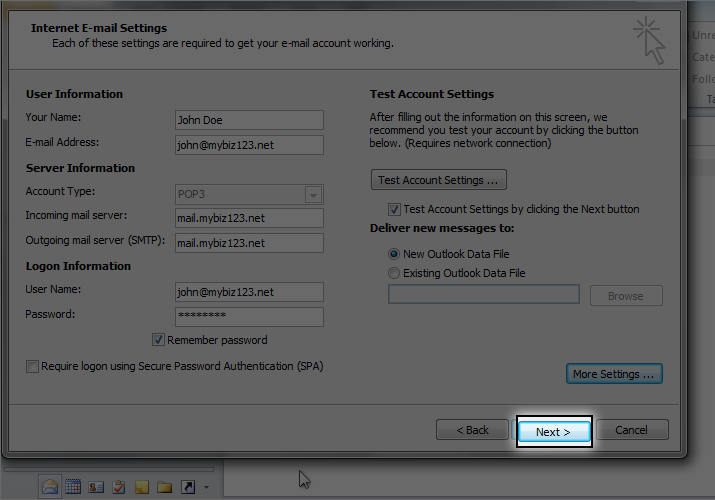
3) Enter your name as you would like it to appear in your emails.
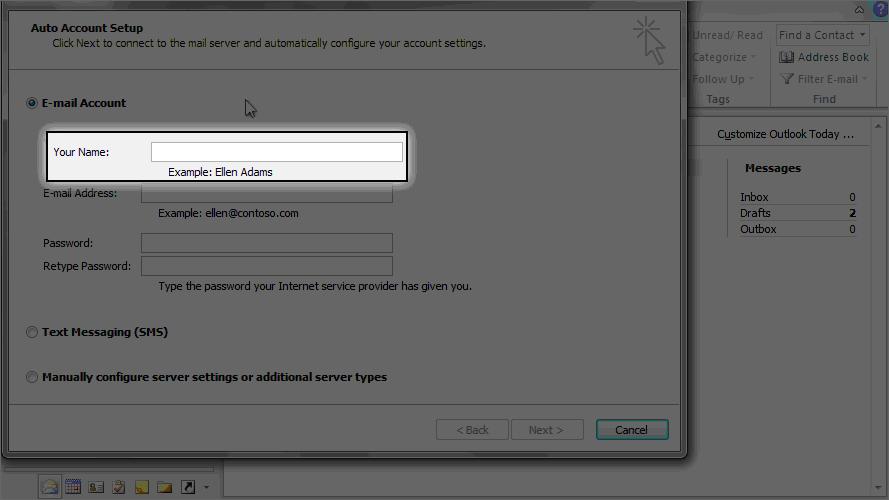
4) Then enter the email address you want to configure here.
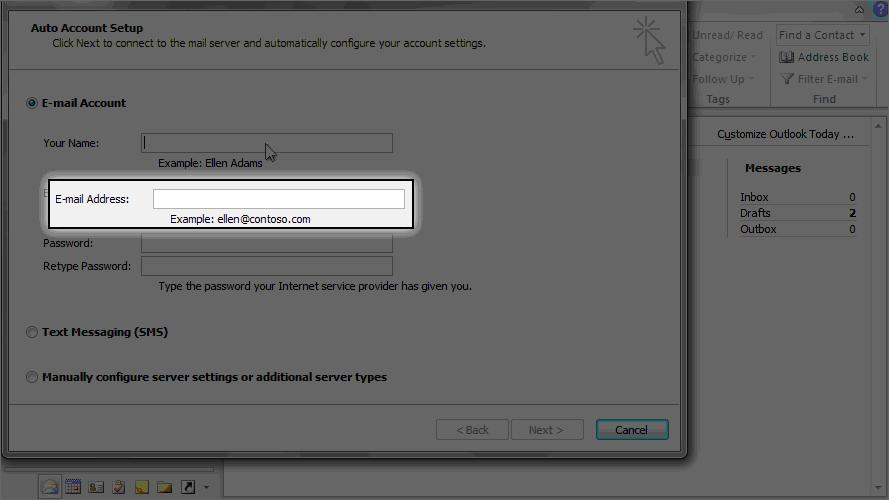
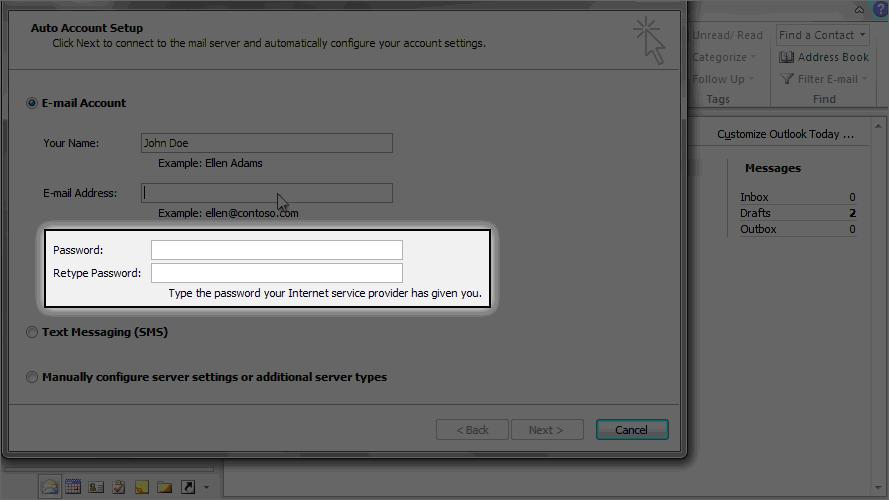
5) Enter and confirm the email account’s password.
Password = The password that was set for the account when it was created in cpanel
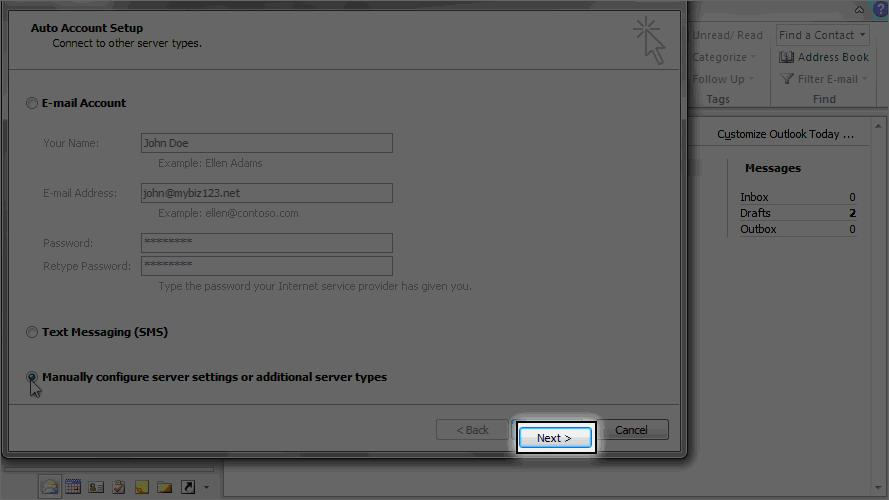
6) Click here to manually configure your mail server settings.
7) Then click “Next”.
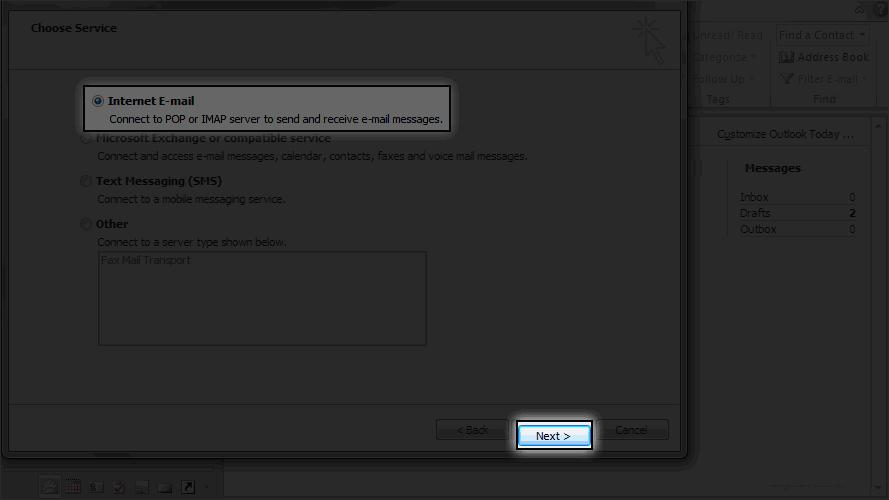
8) Ensure the “Internet E-mail” option is selected, then click “Next” again.
Next we have to configure our server settings.
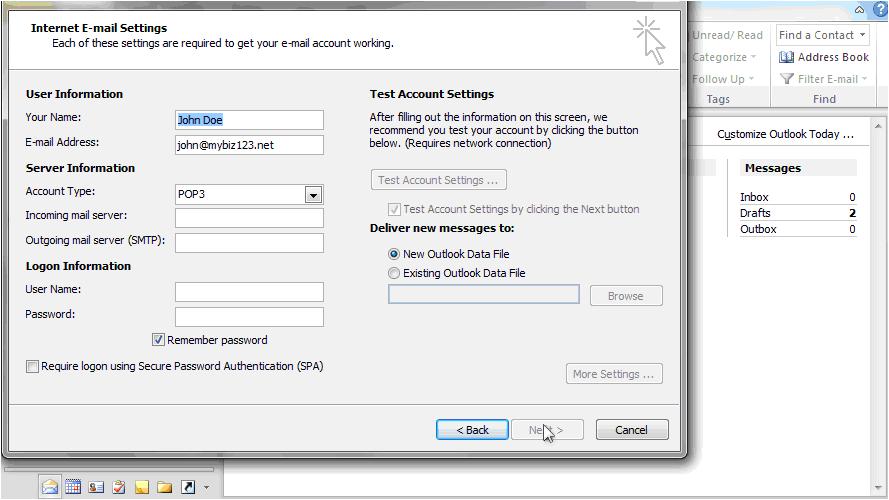
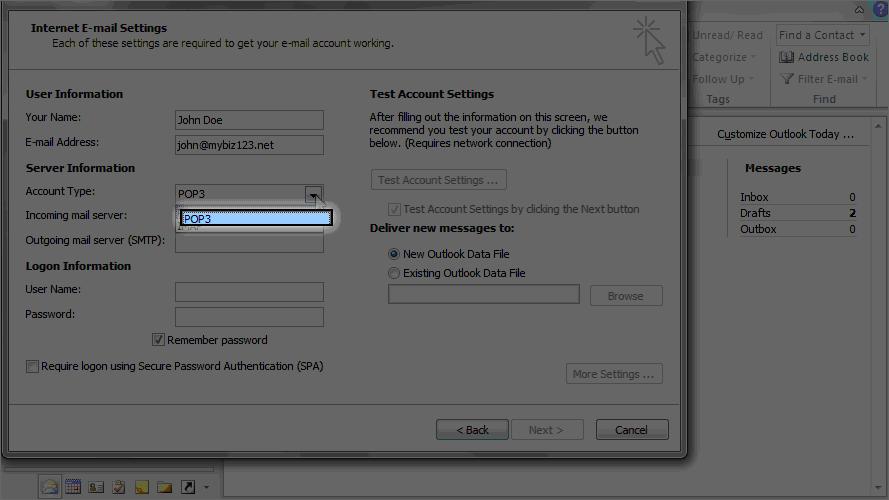
9) Ensure “POP3” is selected as the account type.
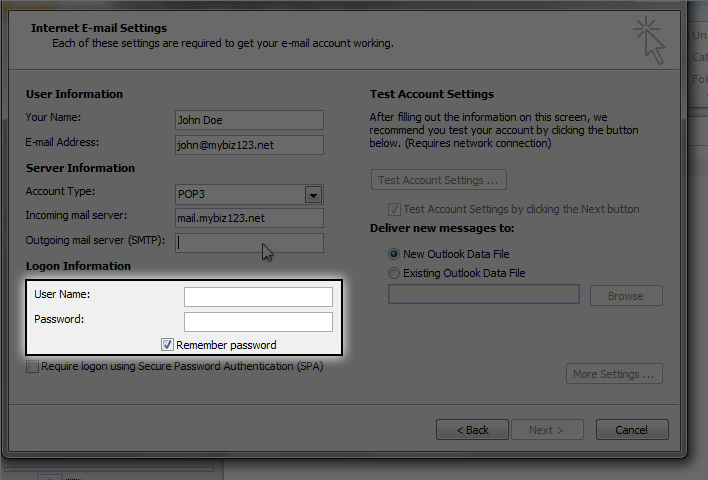
10) Then enter the incoming and outgoing mail server addresses.
Incoming mail server = mail.<yourdomain>
Outgoing mail server (SMTP) = mail.<yourdomain>

11) Enter your full email address as the user name, and the password.
12) Then click the “More Settings” button.
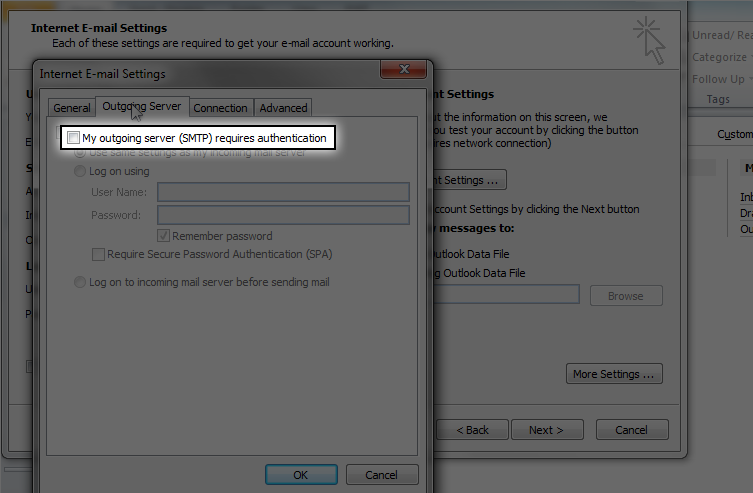
13) Click the “Outgoing Server” tab.

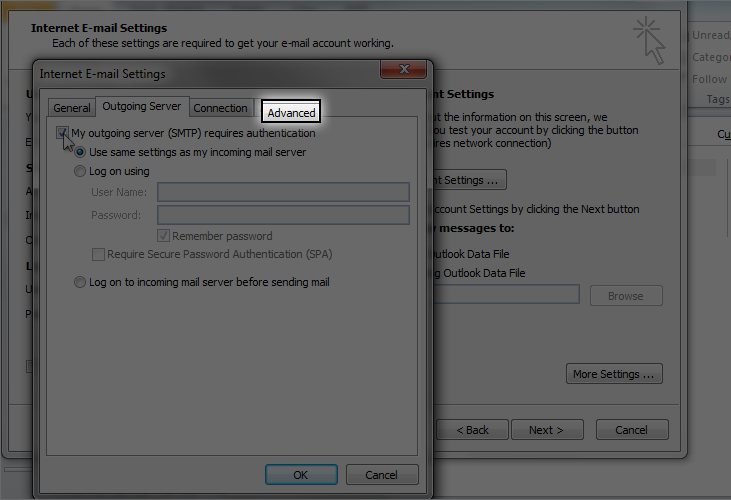
14) Then click here to require outgoing server authentication.
15) Click the “Advanced” tab.
16) If you need to change your server port numbers you can do so here… otherwise just click “OK”.
Outgoing server (SMTP) change to 587
17) Click “Next”.
That’s it! The email account has been added.
