By Simon Tomkins
WooCommerce shipping classes are a very useful feature which allows you to allocate shipping conditions to specific products. Examples of shipping classes in WooCommerce can include:
- Bulky items. If you’re selling furniture, certain items like a couch or chair may have an excess shipping charge.
- Lightweight items. Conversely, some products may fit in an envelope and not require a box so these can have a specific shipping class with cheaper postage.
- Fragile items. Certain products, say pottery, might be delicate and need bubble wrapping and an extra large box to keep it safe.
- Specific packaging, e.g. poster tubes. You may sell posters or artwork and certain items may need to be dispatched in a poster tube.
What is the difference between shipping rates and shipping classes?
A WooCommerce shipping class is just a way of grouping products in the same way. All of your large furniture items can be assigned the shipping class bulky for example. The shipping rate specifies the cost of the class. So all items with the shipping class bulky could have an excess $100 charge. This is the rate.
Adding a shipping class in WooCommerce
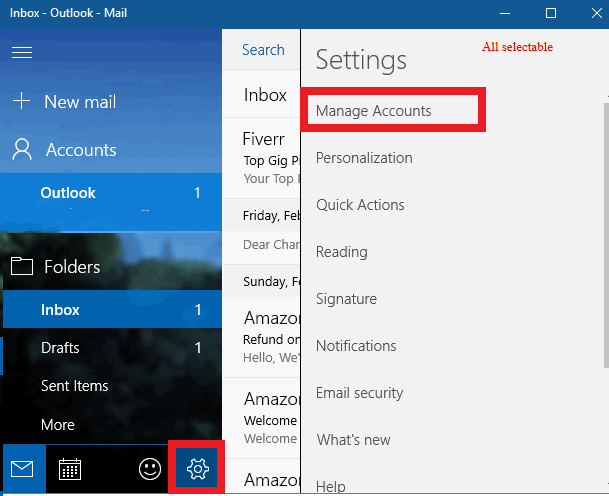
Let’s get started. Go to WooCommerce > Settings and click on the Shipping tab at the top. Then click on the Shipping classes link underneath.
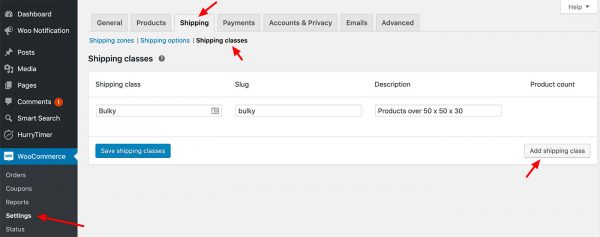
Adding a WooCommerce Shipping Class
Now, enter the same of your shipping class and a slug. If you leave the slug empty it will be automatically filled in for you. I’d recommend adding a description also to make it easier to understand what the class should apply to, especially if you end up creating a number of shipping classes.
Repeat this process for every shipping class you’ll need on your store. Now, let’s start applying this shipping class to your products!
Apply the shipping class to products
Next, let’s apply this new shipping class to a product. Edit the item and within the Shipping tab change the Shipping class dropdown to ‘Bulky’.
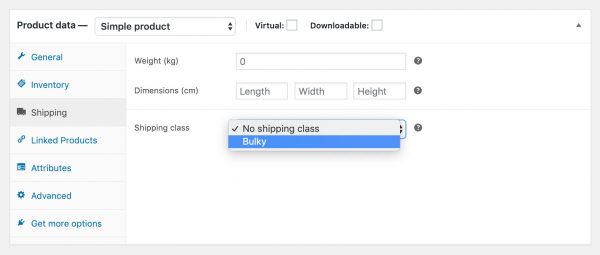
Apply a shipping class to a product
If you’d like to add this class to a number of items you can do so from the main Products screen. Tick the products you want to apply the shipping class to and select Edit from the dropdown on the top left – and click Apply. You can then edit the Shipping class value and save.
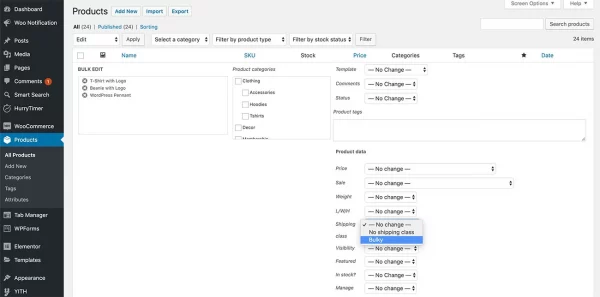
Bulk adding the new shipping class
Setting a Rate for this WooCommerce Shipping Class
Now that we have a class created and applied to a product, we need to set a shipping rate. To keep things simple we’re going to be using flat rates.
- Bulky items will have a $20 flat rate of shipping.
- Everything else will have a flat rate of $5
First, let’s go to: WooCommerce > Settings and click on the Shipping Tab again. This time we’re going to edit the Shipping zone. For instance, in the example below, we’ve just got one zone, the United States or Australia … Hover over that and click the Edit link.
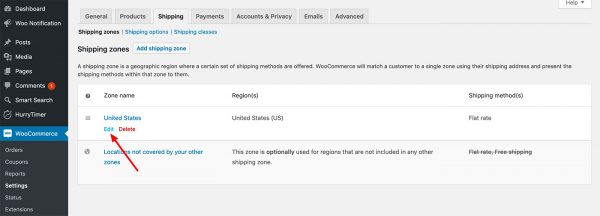
Shipping Zone selection
Now, within this zone you’ll see the Shipping methods you’ve set up. We have one method, Flat rate. If you don’t have any you can add one by clicking on the Add shipping method button below. Hover over this and click Edit.
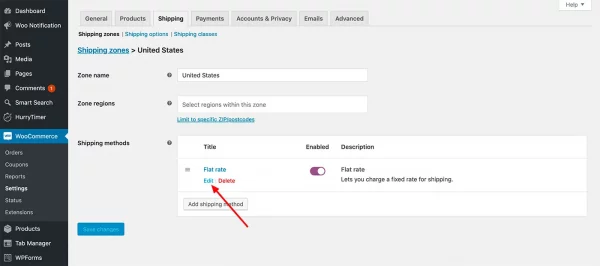
Edit the flat rate
Now, here is where we can add a price next to our bulky shipping class. As per our rates above, we’ll add 5 to the no shipping class cost. The bulky shipping class will be 20. Note that the standard cost is set at 0. If you change it then this number will be also added to your shipping class costs.
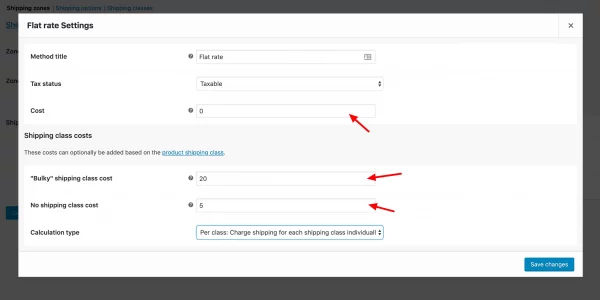
Adding flat rates to each WooCommerce shipping class
Under calculation type you can charge shipping for each class individually. So, if you had one bulky item and one regular item in your cart, the shipping cost would be $25. Or, you can charge on a per order basis and charge based on the most expensive shipping class. If the latter option is selected the shipping cost would be $20 – as the cart contains a bulky item.
Result
Let’s see how this plays out in the cart.
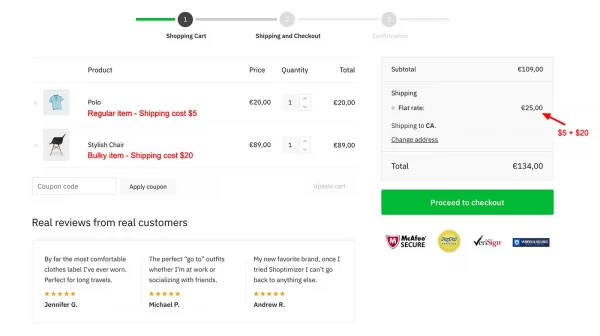
Shipping costs in our cart
In the example above we have two products in our cart.
“Polo” – this is a shirt with a standard shipping rate of $5. There is no shipping class applied to this.
“Stylish chair” – this has the shipping class of bulky added to it – which carries a shipping rate of $20.
You can see on the right, the flat rate has been correctly calculated to be $25. $5 for the polo added to $20 for the chair.
If we had changed the calculation type in the previous step to be based on the most expensive class only – then this shipping charge would be $20.