Categories
IT Blog

Google SSL Certificate Requirements: How it Affects Your Site

For several years now, Google has been forcing websites to implement SSL certificates. It all started with its 2014 HTTPS Everywhere campaign whose goal was to raise awareness of the value of SSL certificates. SSL later became a Google ranking signal to further encourage its adoption.

Currently, over two-thirds of all websites are unencrypted, and Google is taking the next steps to change that.

As of July 2018, Google SSL requirements were enforced by flagging sites without SSL as unsafe in Chrome.

This update goes beyond adding it to its list of ranking factors only. It fundamentally changes the way web users think about their online security.

SSL certificates are designed to make users feel secure while using the internet. Without them, you could be jeopardizing your business, as well as your customer’s sensitive data. This article will explain what an SSL certificate is, how it works, how to install one, and more.

What is an SSL Certificate?

Put simply, an SSL certificate is a text file with encrypted data that you install on your server. This allows you to secure/encrypt sensitive information and communications between your website and your audience. Many think of it as their electronic passport.

SSL stands for ‘Secure Sockets Layer,’ and when a website owner has one, all data passed between web browsers and servers remains private and encrypted.

Without valid certificates, websites cannot establish a secure connection with web servers, meaning that users will not be digitally connected to a cryptographic key. This puts your company’s and your customers’ information at risk, especially considering current cybercrime trends. As a result, the lack of SSL and HTTPS could potentially damage your brand image.

People will avoid purchasing from you or even signing up to your newsletter through fear of having their details stolen. Your conversions will plummet.

One of the most important things in business is to make customers feel like they are visiting a trusted, reliable website where making purchases is safe. SSL establishes a secure connection which then reassures your visitors using visual cues.

Seeing the lock icon or green bar when visiting a site can automatically make a visitor trust your company and take the next step in making a purchase.

How Does a SSL Certificate Work?

When a browser accesses a secured website, the browser and the web server establish a connection. The process is called an ‘SSL handshake,’ but this handshake cannot be seen by the user and happens within a few seconds. What you can see as a user is a green padlock in the URL address bar of your browser which signifies secure data transfer.

Three keys are used to set up a secure connection: public, private, and session keys. Anything encrypted with the public  key can only be decrypted with the private one and vice versa. Encrypting and decrypting using the private and public keys can take a lot of power. Because of this, they are solely used during the SSL Handshake.

When this action takes place, this creates a symmetric session key, which is then used to encrypt all data transmitted from the sites once the secure connection is established.

Here is a better idea of how SSL policies work in simple terms:

  1. The browser connects to a web server via a secured connection. The browser requests that the server identify itself.
  2. The server then sends a copy of the SSL Certificate, including the server’s public key.
  3. The browser checks the root against a list of trusted authorities. It looks to establish that the certificate is unexpired and that the common name is valid for the site it is connecting to.
  4. If the browser trusts the data it received, it creates, encrypts, and sends back a symmetric session key using the server’s public key.
  5. The server decrypts the symmetric session key using its private key. It then sends back an acknowledgment encrypted with the session key to begin the encrypted session. This happens instantaneously.
  6. Both the Server and Browser now encrypt all of the transmitted data using the session key.

The three keys mentioned above work together to establish an encrypted connection. The certificate also contains what is called the “subject,” which is the identity of the website owner. It holds the following information:

  • Name of the holder
  • Serial number and expiration date
  • Copy of the holder’s public key
  • Digital signature of the certificate-issuing authority

Knowing how SSL works can further help you understand why they are so important.

Why is SSL Important To Google?

SSL certificates are important for various reasons, for both business and website visitor. To get an idea of why it could be essential for your site, you can ask yourself the following questions:

  • Does your site take text inputs in the form of login panels, contact forms and search bars?
  • Is your website on HTTP://?

If yes, then you need SSL to prevent risk. Without one, you stand to put your visitors in danger and eventually lose them.

More reasons why this is important:

Encrypt sensitive information – without an HTTPS connection, the computer in between you and the server will be able to see sensitive information, like credit card numbers and passwords. With an SSL, this information is unreadable except to the server the data is being sent to.

Credit card numbers, social security numbers, and login details can be transmitted securely with HTTPS in place.

Provides data protection from online hackers and criminals – online criminals are great at identifying any weakness in networks. They usually strike gold at the point where information is being transmitted. Without the ability to encrypt traffic, you run the risk of being hacked, having information stolen, and more.

Build more trust with customers – building trust with your customers is one of the most important parts of running a successful company in 2018. With trust comes customer loyalty. SSL security reassures customers that their information is safe with just a few visual cues. You boost your business credibility on top of this.

This is also relevant because:

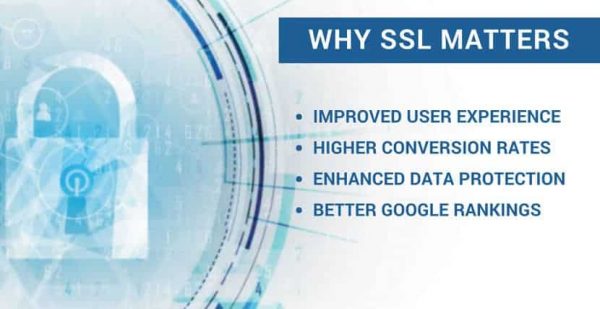
  • HTTPs gives a stronger ranking on Google.
  • You will create safer experiences for your customers.
  • You will build customer trust and improve conversions over time.
  • You will protect both sensitive customer and internal data.
  • You will encrypt browser-to-server and server-to-server communication.
  • You will increase the security of your mobile and cloud apps.
  • You will protect against phishing.

Google said so – There are numerous reasons supporting the fact that this is important, but perhaps the most critical one is ‘because Google said so.’ Nobody wants to experience a drop in search rankings in Google or a negative impact on their business or online reputation. Without SSL, this is likely to happen.

Categories
Uncategorized

WooCommerce Shipping Classes

By Simon Tomkins

WooCommerce shipping classes are a very useful feature which allows you to allocate shipping conditions to specific products. Examples of shipping classes in WooCommerce can include:

  • Bulky items. If you’re selling furniture, certain items like a couch or chair may have an excess shipping charge.
  • Lightweight items. Conversely, some products may fit in an envelope and not require a box so these can have a specific shipping class with cheaper postage.
  • Fragile items. Certain products, say pottery, might be delicate and need bubble wrapping and an extra large box to keep it safe.
  • Specific packaging, e.g. poster tubes. You may sell posters or artwork and certain items may need to be dispatched in a poster tube.

What is the difference between shipping rates and shipping classes?

A WooCommerce shipping class is just a way of grouping products in the same way. All of your large furniture items can be assigned the shipping class bulky for example. The shipping rate specifies the cost of the class. So all items with the shipping class bulky could have an excess $100 charge. This is the rate.

Adding a shipping class in WooCommerce

Let’s get started. Go to WooCommerce > Settings and click on the Shipping tab at the top. Then click on the Shipping classes link underneath.

Adding a WooCommerce Shipping Class

Now, enter the same of your shipping class and a slug. If you leave the slug empty it will be automatically filled in for you. I’d recommend adding a description also to make it easier to understand what the class should apply to, especially if you end up creating a number of shipping classes.

Repeat this process for every shipping class you’ll need on your store. Now, let’s start applying this shipping class to your products!

Apply the shipping class to products

Next, let’s apply this new shipping class to a product. Edit the item and within the Shipping tab change the Shipping class dropdown to ‘Bulky’.

Apply a shipping class to a product

If you’d like to add this class to a number of items you can do so from the main Products screen. Tick the products you want to apply the shipping class to and select Edit from the dropdown on the top left – and click Apply. You can then edit the Shipping class value and save.

Bulk adding the new shipping class

Setting a Rate for this WooCommerce Shipping Class

Now that we have a class created and applied to a product, we need to set a shipping rate. To keep things simple we’re going to be using flat rates.

  • Bulky items will have a $20 flat rate of shipping.
  • Everything else will have a flat rate of $5

First, let’s go to: WooCommerce > Settings and click on the Shipping Tab again. This time we’re going to edit the Shipping zone. For instance, in the example below, we’ve just got one zone, the United States or Australia … Hover over that and click the Edit link.

Shipping Zone selection

Now, within this zone you’ll see the Shipping methods you’ve set up. We have one method, Flat rate. If you don’t have any you can add one by clicking on the Add shipping method button below. Hover over this and click Edit.

Edit the flat rate

Now, here is where we can add a price next to our bulky shipping class. As per our rates above, we’ll add 5 to the no shipping class cost. The bulky shipping class will be 20. Note that the standard cost is set at 0. If you change it then this number will be also added to your shipping class costs.

Adding flat rates to each WooCommerce shipping class

Under calculation type you can charge shipping for each class individually. So, if you had one bulky item and one regular item in your cart, the shipping cost would be $25. Or, you can charge on a per order basis and charge based on the most expensive shipping class. If the latter option is selected the shipping cost would be $20 – as the cart contains a bulky item.

Result

Let’s see how this plays out in the cart.

Shipping costs in our cart

In the example above we have two products in our cart.

“Polo” – this is a shirt with a standard shipping rate of $5. There is no shipping class applied to this.
“Stylish chair” – this has the shipping class of bulky added to it – which carries a shipping rate of $20.
You can see on the right, the flat rate has been correctly calculated to be $25. $5 for the polo added to $20 for the chair.

If we had changed the calculation type in the previous step to be based on the most expensive class only – then this shipping charge would be $20.

Categories
Uncategorized

Email Setup for Windows Mail (Windows 8, 10)

Step 1 – Click the Settings icon then Manage Accounts.

Step 2 – Click Add account.

Step 3 – Select Other account.

Step 4 – Add your email address and password then click Sign in.

Step 5 – Click Advanced on the next screen.

Step 6 – Add your mail settings and click Sign in.

Step 6 – Test the email account by sending an email from / to your email address (e.g. from john@yourdomain.net.au to john@yourdomain.net.au). If this device can receive mail, the incoming server settings are correct. If the device can send mail, the outgoing server settings are correct as well.


Categories
Setup email

Fix Email Settings in Outlook 2016 for Windows

Step 1 – Click on FILE.

Then click on the Account Settings option (click Account Settings, then click the next box named Account Settings).

Step 2 – (1) Select the account you want to fix, then (2) click Repair.

Step 3 – Select Advanced Options then Let me repair my account manually.

Step 4 – Ensure the email settings match the below:

(1) The Email Address and Username should both show the full email address.
(2) Incoming and Outgoing mail server should be the same.
(3) If your password is in there, keep it as it is. Come back to this and re-add the password if your email still fails after checking the other settings.
(4) Make sure the “Require logon using Secure password” box is unticked.
(5) Click More Settings

Step 5 – Make sure the “My outgoing server requires authentication” box is ticked, and “use same settings as my incoming” is selected. Click on the Advanced tab once this is set.

Step 6 – Make sure the Server Port and Root folder path settings are the same as below. Click OK once that’s done.

Step 7 – Once that’s done, click Next > Outlook will attempt to connect to our server.

If everything is correct, you’ll see something like this.


Categories
Setup email

Outlook 2016 for Windows

Step 1 – Click on File.

Step 2 – Click on Add Account.

Step 3 – Add your email address, select Advanced Options and tick Let me set up my account manually then click Connect.

Step 4 – Select IMAP as the account type.

Step 5 – Add your mail settings and click Connect.

Step 6 – Add your email username (full email address) and password in and click OK.

Step 7 – Test the email account by sending an email from / to your email address (e.g. from john@yourdomain.net.au to john@yourdomain.net.au). If this device can receive mail, the incoming server settings are correct. If the device can send mail, the outgoing server settings are correct as well.

Categories
Setup email

Fix Email Settings In Outlook For Mac

If your email account has stopped working, an update or crash may have caused some settings to change. This guide will take you through the email settings so you can go through and fix everything up.

Step 1 – Click on Outlook > Preferences.

Then click on Accounts.

Step 2 – Select the account you want to fix.

Step 3 – Ensure the settings are entered as below:

(1) The Email Address and Username should both show the full email address.
(2) If your password is in there, keep it as it is. Come back to this and
re-add the password if your email still fails after checking the other
settings.
(3) Incoming and Outgoing server should be the same.
(4) Make sure both boxes are ticked (leave “Always use secure password” unticked).
(5) Add the correct port numbers (Incoming IMAP 993 or POP 995, Outgoing 465).

Note: On rare occasions, due to some network settings on your
router/firewall/office network, the SSL settings above don’t work. If
you continue having problems, try these settings instead (use Port 110 for Incoming if your email is set as POP).

Step 4 – Click on More Options.

Step 5 – Make sure Authentication is set to Use Incoming Server Info then click OK. Close all the windows then test the email by sending an email from / to your email address (eg:
from john@yourdomain.net.au to john@yourdomain.net.au). If a pop up box
comes up and asks for your password, put it in then.


Categories
Setup email

Email setup for Outlook on Mac

Step 1 – Click on Tools > Accounts.

Step 2 – Click on + > E-mail.

Step 3 – Add your email address, password, and the corresponding server settings.

Step 4 – Set outgoing server authentication to ‘Use Incoming Server Info’.

Step 5 – Test the email account by sending an email from / to your email address (e.g. from john@yourdomain.net.au to john@yourdomain.net.au). If this device can receive mail, the incoming server settings are correct. If the device can send mail, the outgoing server settings are correct as well.


Categories
Setup email

Backup emails using Microsoft Outlook

We recommend customers back up their emails regularly. The following instructions apply to Microsoft Outlook. Consult your help file for any issues related to your specific email client.

To back up emails to a new Microsoft Outlook PST file:

  1. Open Microsoft Outlook
  2. Click File from the menu bar and select Import and Export
  3. Select Export to a file, then click [Next]
  4. Select Personal Folder File (.pst), then click [Next]
  5. Select the root folder (e.g. Mailbox – MyName) and select the Include sub-folders checkbox
  6. Click [Next]
  7. Type or browse to the folder where you want to save the new file, and name the file
  8. Click [Finish]

To import a backed up file into Microsoft Outlook:

  1. Open Microsoft Outlook
  2. Click File from the menu bar and select Import and Export
  3. Select Import from another program or file, then click [Next]
  4. Select Personal Folder File (.pst), and then click [Next]
  5. Locate and select the folder that contains the backup .pst file
  6. Click [Next]
  7. Select the root folder (e.g. Mailbox – MyName) and select the Include sub folders checkbox
  8. Click [Finish]
Categories
IT Blog Woocommerce

How To Customize Product Sorting in WooCommerce

To customize the product sort order of your products on the product category archive page. The archive used the default alphabetical sorting, but you can change the sort oder of products in a category

Custom Sorting

Listing only products in a category:

  • Click on “Products” in Admin left sidebar
  • Click on “Select on Category”: Click on a category in dropdown list
  • Click on button “Filter” in far right”: to list only products in your selected category above..

Change “menu order” of each product in category:

  • Click “Edit” on a product to go product edit screen
  • Click on “Advanced”: to change product’s “Menu order”: it should be 0,1, 2, 3, 4 ….
  • Click “Update” to save changes.


Categories
IT Blog Woocommerce

How to Add Products in WooCommerce: Step-by-Step Guide

Adding a product

Before adding your first product, let’s get familiar with how product categories, tags, and attributes work.

Product Categories

Product categories and tags work in much the same way as normal categories and tags you have when writing posts in WordPress. They can be created, edited, and selected at any time. This can be done when you first create a product or come back and edit it or the category/tag specifically.

Attributes

These can be added per product, or you can set up global attributes for the entire store to use (e.g., in layered navigation).

Product Types

With attributes and categories set up and stock management configured, we can begin adding products. When adding a product, the first thing to decide is what type of product it is.

Simple – covers the vast majority of any products you may sell. Simple products are shipped and have no options. For example, a book.

Grouped – a collection of related products that can be purchased individually and only consist of simple products. For example, a set of six drinking glasses.

Virtual – one that doesn’t require shipping. For example, a service. Enabling this, disables all shipping related fields such as shipping dimensions. A virtual product will also not trigger the shipping calculator in cart and checkout.

Downloadable – activates additional fields where you can provide a downloadable file. After a successful purchase, customers are given a downloadable file as a link in the order notification email. This is suitable, for example, for a digital album, PDF magazine, or photo.

External or Affiliate – one that you list and describe on your website but is sold elsewhere.

Variable – a product with variations, each of which may have a different SKU, price, stock option, etc. For example, a t-shirt available in different colors and/or sizes.

Other types are often added by extensions. For example, WooCommerce Subscriptions adds new product types as does WooCommerce Bookings.

Adding a Simple Product

Adding a Grouped products

Adding a External/Affiliate Product

Adding a Variable product

Categories
IT Blog Setup email

Whitelist IP for Office 365

This document will cover how to whitelist our simulated phishing email servers in Office 365.

SECTION 1: SET UP YOUR IP ALLOW LIST

Step 1:

Log into your mail server admin portal and go into the Admin -> Exchange area.

Step 2:
Click on Admin -> Exchange.

Step 3:
Click on Connection Filter (beneath Protection heading).

Step 4:
Click on Connection Filter, then click the Pencil icon to edit the default connection filter policy.

Step 5:
Under the IP Allow list, click the + sign to add an IP address.

Step 6:
Adding our IPs to your Allowed IP list:

Step 7:
Click OK, then Save. Next, you will want to set up a mail flow rule to allow our mail to bypass spam filtering and the Clutter folder.

SECTION 2: BYPASS CLUTTER AND SPAM FILTERING

To ensure our messages will bypass your Clutter folder as well as spam filtering within Microsoft’s EOP, you can follow the steps below.

Step 1:
Go to Admin -> Mail -> Mail Flow.

Step 2:
Click the (+) Create New Rule button beneath Mail Flow -> Rules.

Admin Center:

Step 3:
Give the rule a name, such as (Bypass Clutter & Spam Filtering by IP Address)
Click on “more options”
Add the condition “Apply this rule if….”
Select “The sender”, then click on More Options and select “IP address is in any of these ranges or exactly matches:
New Rule Screen:

Step 4:
Specify Sender IP addresses:

Step 5:
Beneath “Do the following”, click “Modify the message properties” then “Set a Message Header”
Modifying the message properties:

Step 6:
Set the message header to this value:
Set the message header “X-MS-Exchange-Organization-BypassClutter” to the value “true”.

NOTE: Both “X-MS-Exchange-Organization-BypassClutter” and “true” are case sensitive.
Set the message header value:

Step 7:
Add an additional action beneath “Do the following” to “Modify the message properties”. Here, click on “Set the spam confidence level (SCL) to…” and select “Bypass Spam Filtering”.

Bypass Spam Filtering

Step 8:
Click Save. An example of the completed rule is below.

Completed Mail Flow Rule

Jeff Williams

Categories
IT Blog

Google API Key

Follow these steps to get your Google API key:

  1. Visit https://console.developers.google.com/apis/

    (You may need to log on to your Google account – assuming you have one – first. If not, you’ll have to sign up. We won’t cover that here.)

  2.  Click the ‘Google Maps JavaScript API’ link
  3. If required, create a project (or select an existing one – see step 4)

    Give the new project a name and click CREATE
  4. Enable the API
  5. Go to CREDENTIALS
  6. Click ‘Find out what credentials you need?’ and copy the contents of the ‘Here is your API key’ box.

    Your API key should be a long string of characters (upper/lower case and numbers)

  7. Set restrictions (optional – recommended)

    Your key may not function correctly if you do not fully specify the domain names used to access your site (e.g. yoursite.com & yoursite.net)

  8. Add the Google Places API Web Service to your project

    From your Google Developer Console Dashboard click ‘Enable API‘, then click ‘Google Places API Web Service‘

    Click ‘ENABLE‘ to add to your project:

  9. Be sure to click SAVE at the bottom.