Learn how to set up your business e-mail account yourname@yourcompany.com.au (this is example email address, you need to replace with your real business email) on your Android smartphone, allowing you to send and receive e-mails wherever you go. The images used in this guide reflect Android OS 4.4 (KitKat).
Newer operating systems
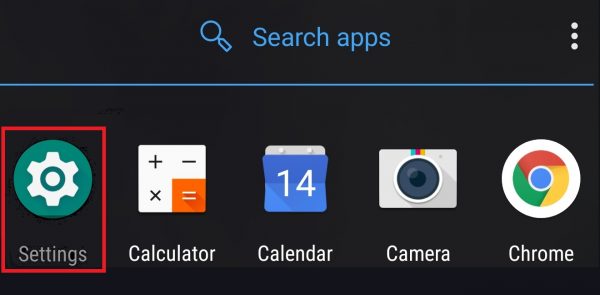
Step 1 – Find the Settings app and open it.
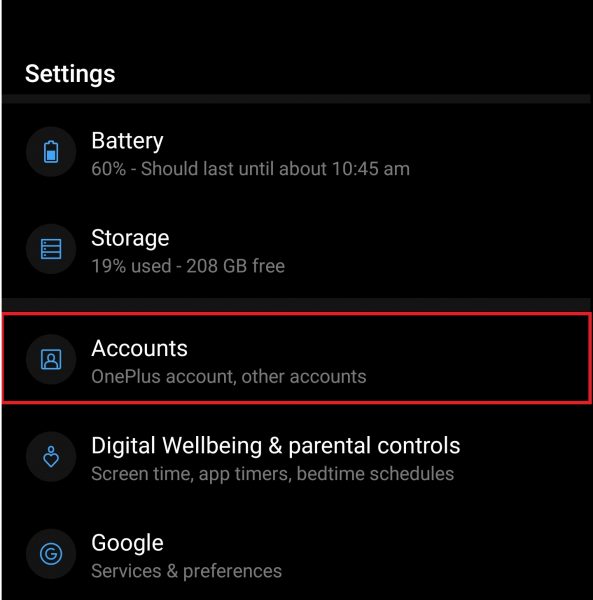
Step 2 – Select Accounts.
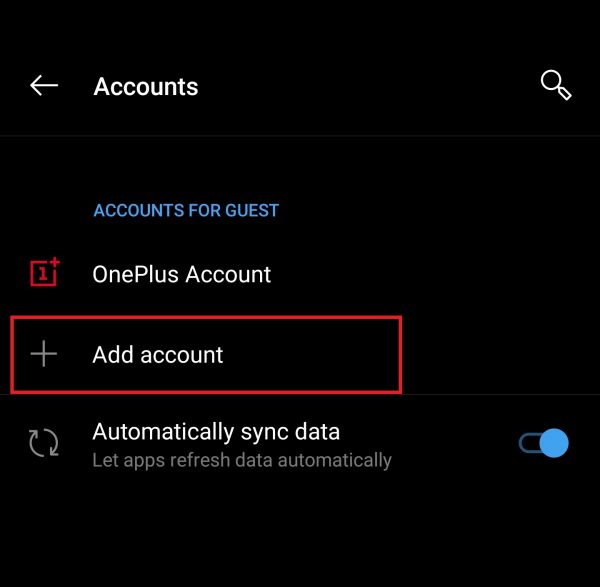
Step 3 – Select Add Account.
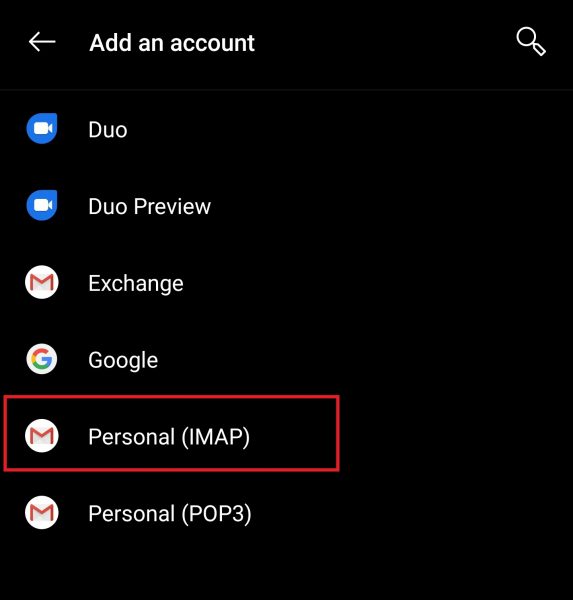
Step 4 – Select Personal (IMAP).
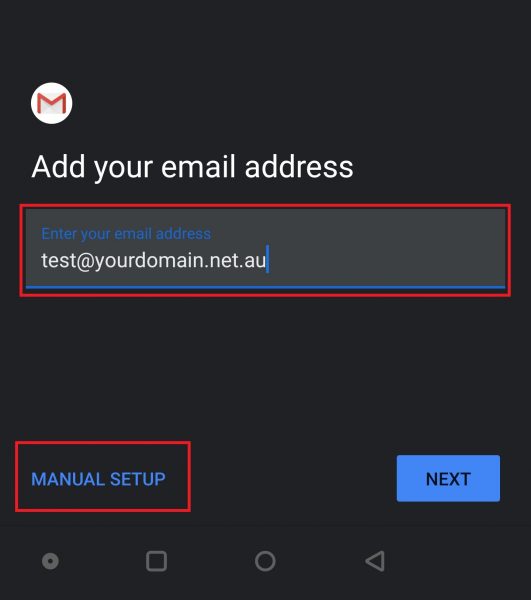
Step 5 – Add your email address, then select MANUAL SETUP.
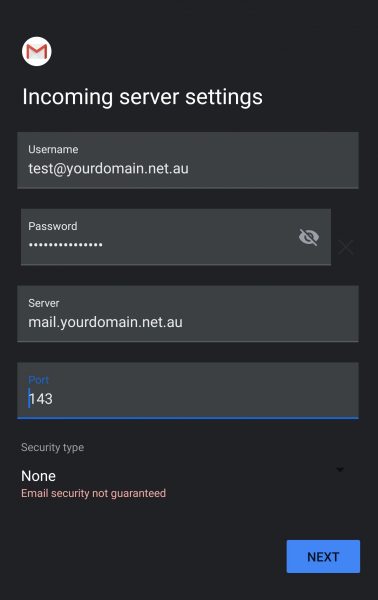
Step 6 – Enter your Username, Password, and the incoming mail server settings found here, then select Next.
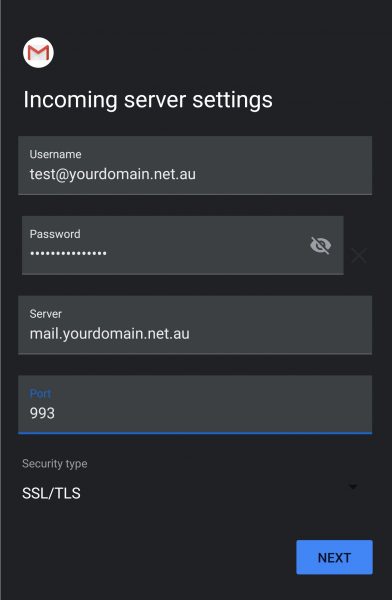
Note: On rare occasions, due to some network settings on your router/firewall or on an outdated mail client, the SSL settings above don’t work. If you continue having problems, try these Non-SSL settings instead.
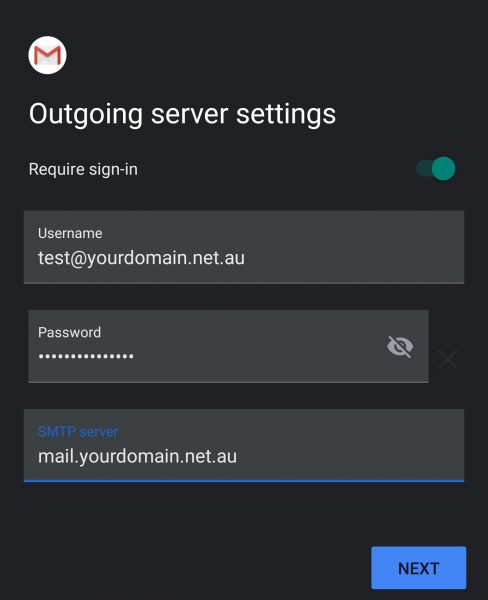
Step 7 – Enter your Outgoing server settings.
Usually the SMTP server port is autoconfigured, but if not use port 465 for SSL (default) or port 587 for non-SSL.
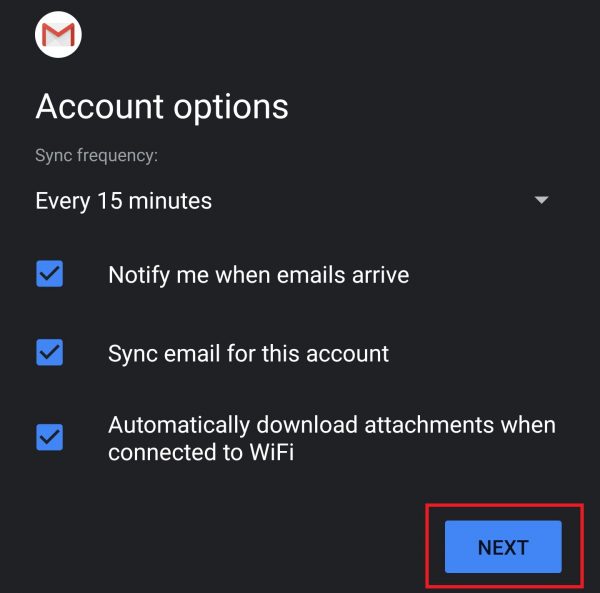
Step 8 – Leave these settings as default and select Next.
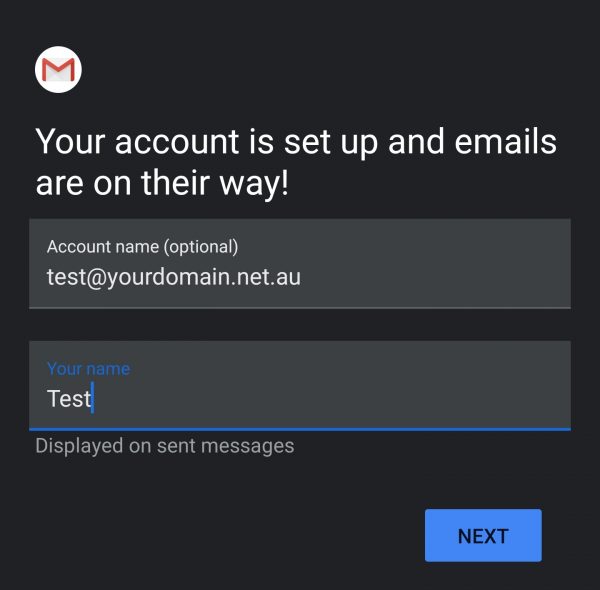
Step 9 – Enter in a name for your email account, and select Next.
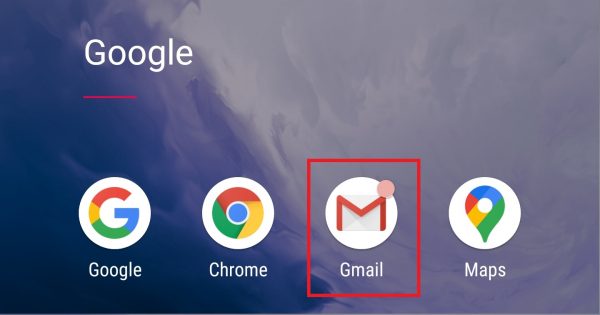
Step 10 – Close the App completely,
then open the default Gmail app and try sending an email from / to your email address (e.g. from john@yourdomain.net.au to john@yourdomain.net.au). If you can receive emails on the phone, your incoming settings are correct. If you can send mail from the phone, the outgoing mail settings are correct as well.
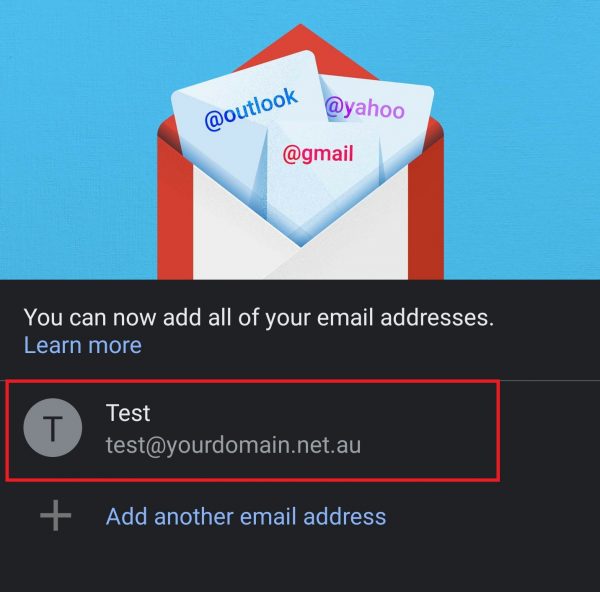
You are also able to add email accounts from within the Gmail app directly, by selecting Add Another Email Address. Otherwise, select the email address to start managing your emails.
Older operating systems
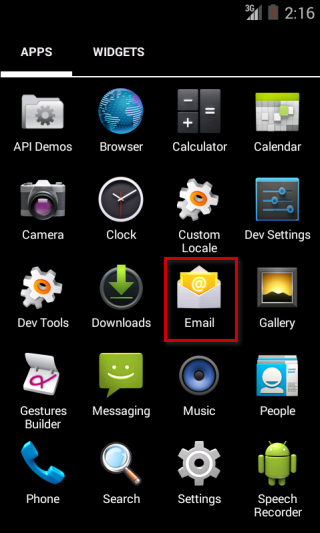
Step 1
Find and click Email on your Android phone.

The Email icon is located on the apps page
Step 2
Enter your email address and password and then press Next.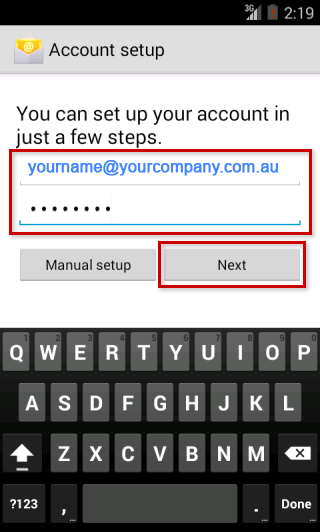
The basic settings screen
Step 3
Select IMAP.
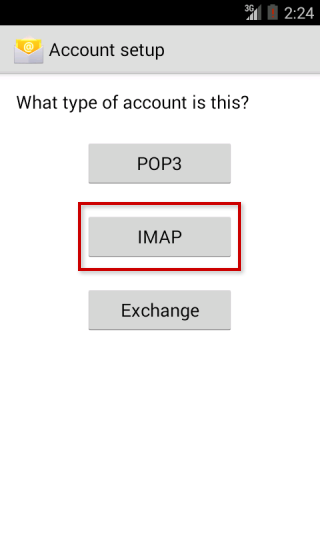
The account type selection screen
Step 4
Enter the following incoming server information and press Next when finished:

The incoming server settings screen
Step 5
Enter the following outgoing server information and press Next when finished:
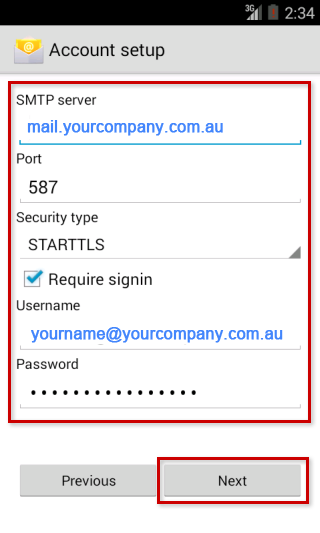
The outgoing server settings screen
Step 6
Give this account a name and enter Your name. It is suggested to use your e-maill address as the account name to differentiate it from any other e-mail accounts you may set up on your phone.
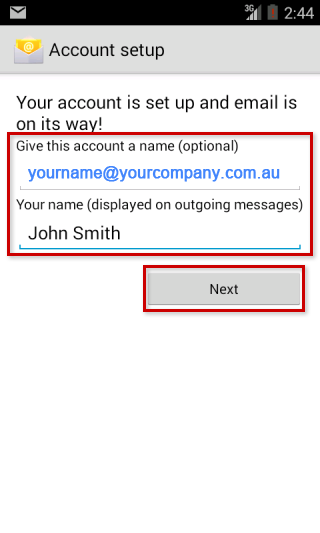
The final settings screen
Step 7
You can now click the Email icon again to access your 1&1 e-mail account on your phone.
The Email icon is found on the apps screen
The setup is complete. Your phone should download and display your recent e-mails in the application